How to compress and optimize images for the web
How to convert images to WebP with the right balance between weight and quality, the tests we ran and the free converter we use at the agency.

In the digital world, image optimization is crucial for fast, effective websites and apps, and even for cutting data usage on mobile devices. One image format that stands out for its efficiency is WebP. Developed by Google, it offers better compression and image quality comparable to popular formats like JPEG and PNG, with smaller files. But how do you turn your images into WebP simply and efficiently?
Today we explain in detail how image conversion works. Our agency built a Python script that we use to convert images to WebP with adjustable parameters such as method and lossless. At the end, we share an executable so anyone can use the tool and optimize their images without complex setup.
A practical example: the magic behind the conversion
Imagine you have a photo you want to put on a website. Now imagine that photo is a delicious cake, but a very big one, hard to carry and share. What we want is to "pack" that cake: make it smaller without losing the flavor (the image quality). WebP is the magic tool that lets us do that very efficiently.
For this "packing", there are two main parameters you can adjust: method and lossless. The first is about how much effort the tool puts into shrinking the image. The second decides whether the image loses quality during the process. Before the technical details, think of this metaphor:
- Method (compression effort): like choosing the oven to bake the cake. A high-performance oven (more effort) can make the cake smaller, but it takes longer to bake.
- Lossless (no quality loss): like choosing to keep the cake's texture perfect, without losing a single piece while "packing" it. With lossless, the cake keeps all of its essence. Without it, the cake may lose a little texture to be easier to carry.
With that analogy in mind, let's see how these parameters work technically.
How the method and lossless parameters work
Method: the compression level
The method parameter is the effort the tool puts into compressing the image. It goes from 0 to 6: 0 is the least effort (and the fastest), 6 is the most effort (and the slowest). The higher the value, the harder it tries to compress, which means smaller files. In exchange, processing time grows with the effort, so keep that in mind when choosing the level.
- Method 0: the fastest process, but compression is not as effective. Use it when time is critical.
- Method 6: takes longer, but compression is very efficient and files get much smaller, at a higher processing cost.
Method directly affects the final file size. It is a trade-off between speed and efficiency.
Lossless: keep the quality or reduce it?
The lossless parameter sets the type of compression. When it is on (value True), the tool guarantees no quality loss at all: the result is identical to the original. It is perfect when quality must be preserved at any cost, but it usually produces bigger files.
When lossless is off (value False), the tool allows lossy compression. It shrinks the file more aggressively, but may cause a slight loss of visual quality, especially in images with fine detail. It is the right choice when file size and loading time come first.
Summary:
- Lossless = True: compressed with no quality loss, but the file may be bigger.
- Lossless = False: compressed aggressively, with some quality loss, and the file gets smaller.
Combining method and lossless
When you use method and lossless together, the result changes with the values you pick for both. A high method (say, 6) with lossless on takes longer but preserves quality, giving the smallest possible file with no loss of detail. A low method with lossless off is faster, but quality may suffer a little to reach a more compact file.
Combining both parameters is the fine-tuning that gives your images the least weight and the best quality. LOSSY images use lossless: false: they give up a few pixels but keep quality high, and work best for photos and images with many tones and shadows. LOSSLESS images use lossless: true: they keep exactly the same quality and resolution so no light or dark point is lost, and are ideal for images with text, logos, vectors and charts.
We tested two images, and their sizes dropped considerably. Here are the conversion logs.
Compression comparison: Encomenda.jpg
| Mode | Method | Size | Time |
|---|---|---|---|
| LOSSY | 0 | 1,170.72 KB | 1.41 s |
| LOSSY | 1 | 1,144.36 KB | 1.44 s |
| LOSSY | 2 | 964.16 KB | 1.71 s |
| LOSSY | 3 | 887.05 KB | 5.71 s |
| LOSSY | 4 | 889.36 KB | 6.43 s |
| LOSSY | 5 | 851.33 KB | 6.38 s |
| LOSSY | 6 | 813.81 KB | 6.77 s |
| LOSSLESS | 0 | 17,898.87 KB | 19.79 s |
| LOSSLESS | 1 | 15,660.61 KB | 33.84 s |
| LOSSLESS | 2 | 15,660.61 KB | 30.61 s |
| LOSSLESS | 3 | 15,660.61 KB | 31.81 s |
| LOSSLESS | 4 | 15,599.35 KB | 43.62 s |
| LOSSLESS | 5 | 15,491.21 KB | 41.03 s |
| LOSSLESS | 6 | 15,491.21 KB | 39.21 s |
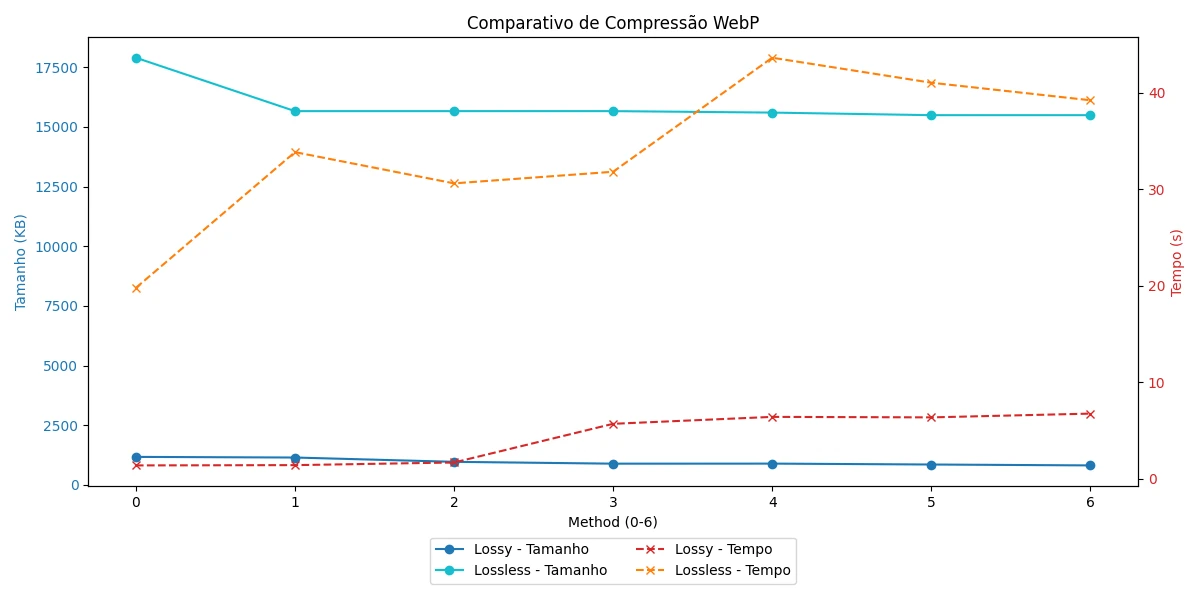
The chart above is a WebP conversion benchmark. It shows how different method and lossless settings affect the final file size and helps compare the algorithm's performance in each scenario.
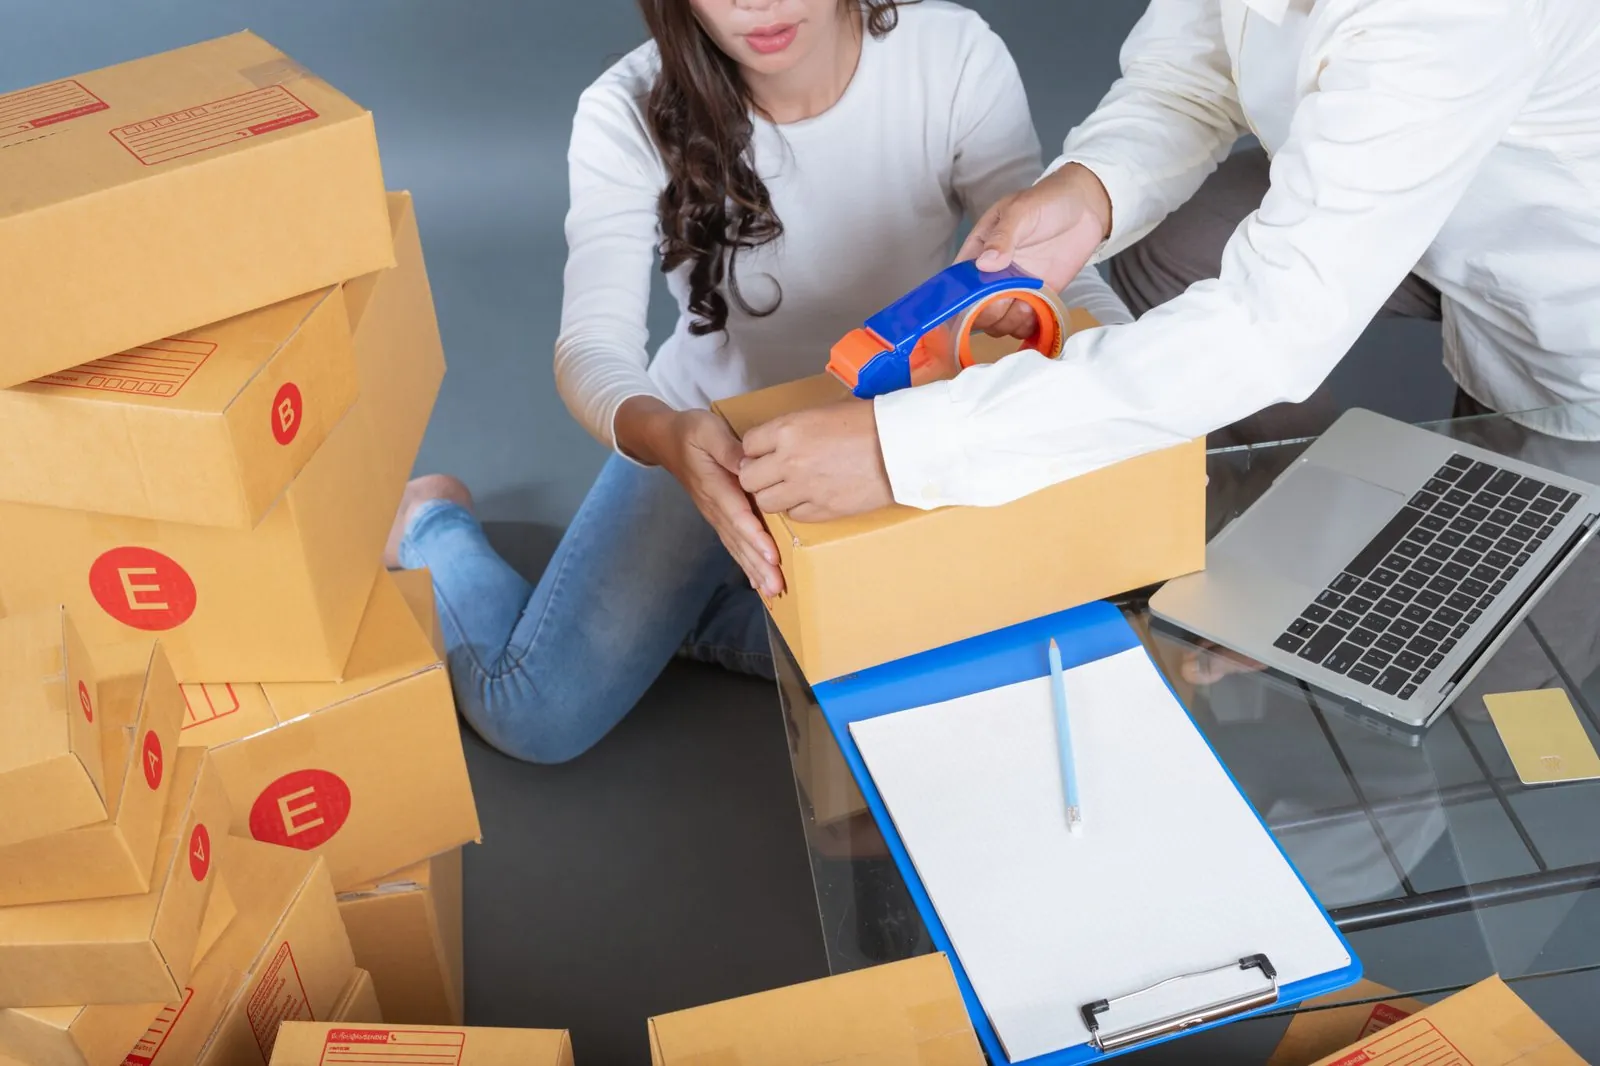
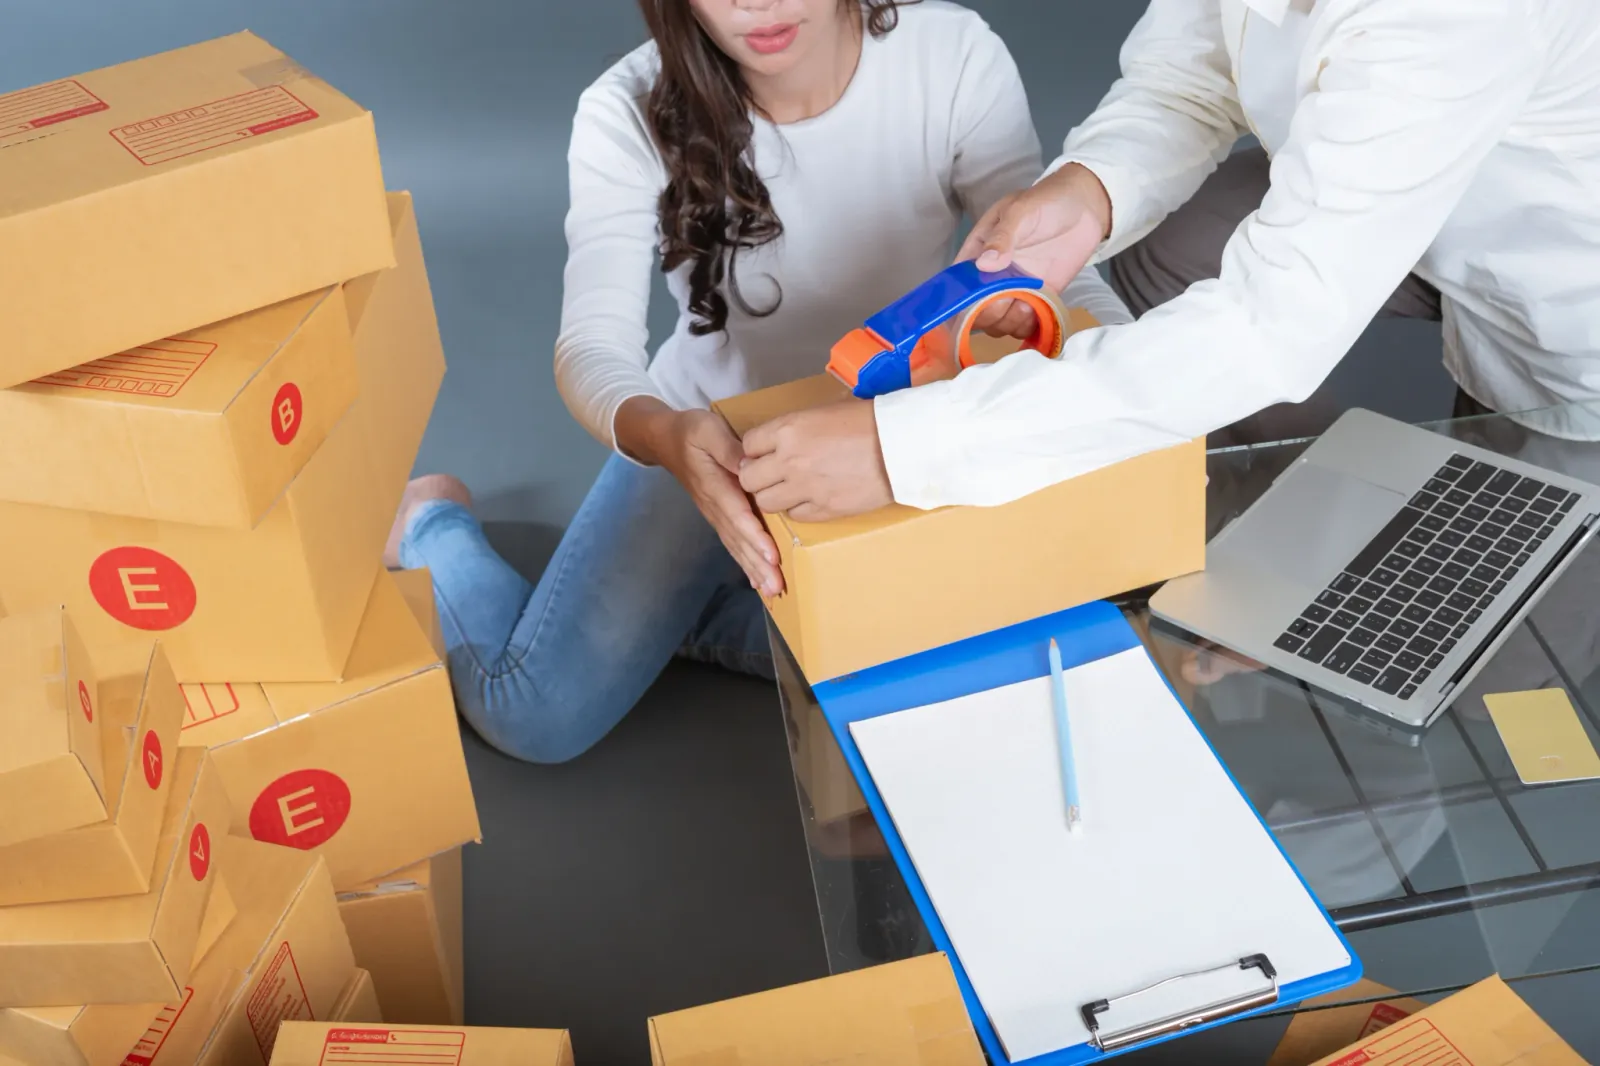
Below, the original image we used and the version converted by our script:
Compression comparison: Plano de fundo.png
Now, the data for a lighter file, in another format and at 2K resolution:
| Mode | Method | Size | Time |
|---|---|---|---|
| LOSSY | 0 | 497.53 KB | 0.83 s |
| LOSSY | 1 | 498.04 KB | 0.25 s |
| LOSSY | 2 | 537.66 KB | 0.35 s |
| LOSSY | 3 | 535.74 KB | 0.74 s |
| LOSSY | 4 | 513.48 KB | 1.00 s |
| LOSSY | 5 | 515.80 KB | 1.12 s |
| LOSSY | 6 | 498.30 KB | 8.43 s |
| LOSSLESS | 0 | 1,821.72 KB | 1.46 s |
| LOSSLESS | 1 | 1,205.19 KB | 3.67 s |
| LOSSLESS | 2 | 1,194.01 KB | 4.81 s |
| LOSSLESS | 3 | 1,194.01 KB | 4.37 s |
| LOSSLESS | 4 | 1,194.01 KB | 4.93 s |
| LOSSLESS | 5 | 1,284.81 KB | 4.80 s |
| LOSSLESS | 6 | 1,284.81 KB | 4.12 s |
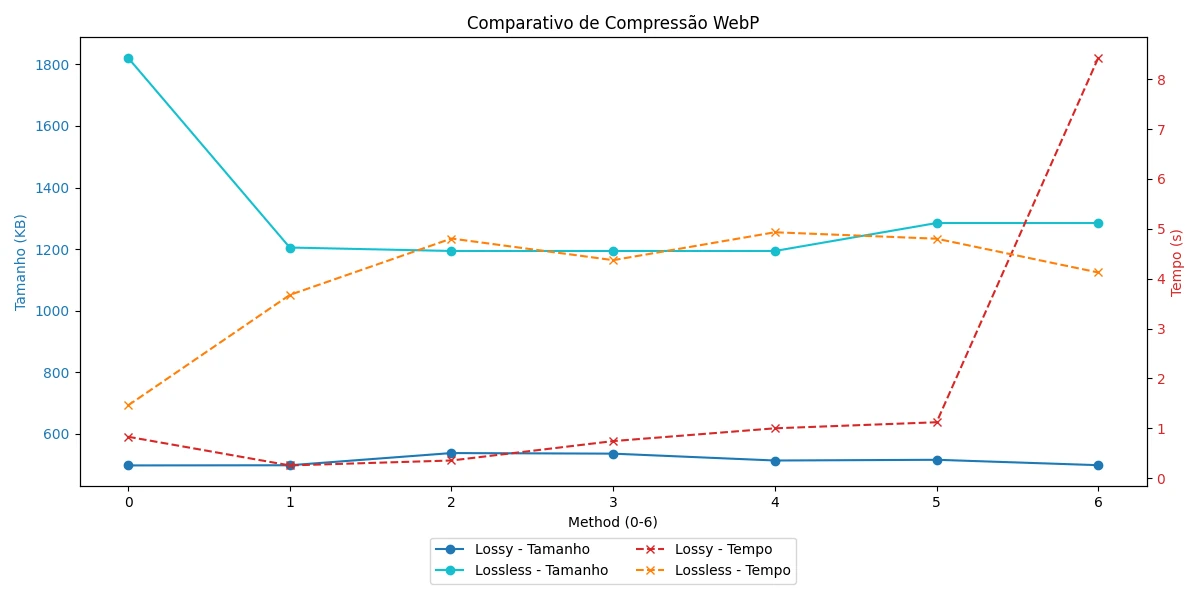
This second chart shows the same benchmark for the PNG: the impact of method and lossless on the final file size.
Below, the original image and the version converted by our script:


The conversion log
During conversion, the script writes a detailed log with the file name, resolution, size before and after, quality level, method used, whether compression was lossless and the total conversion time. That gives you full control over every conversion and lets you review the process for future adjustments.
The log records date and time in the Brazilian format, DD/MM/YYYY.
How to use the converter
Now that you understand the parameters and the logic behind WebP conversion, you can use the tool to automate the process. It was designed so anyone can use it, no programming needed: download the file, pick the folder with the images you want to convert, choose method and lossless, and wait for the processing.
The file is a .zip with the Windows program. Use the button below to download it.